
What happens when the “Magic” of AI meets the “Reality” of Unity’s Serialized Pipeline.
The promise of Unity 6.4 and the Model Context Protocol (MCP) is simple: “Tell the AI what you want, and it builds it.” But as any developer knows, the distance between a prompt and a playable build is paved with missing shaders, revoked permissions, and mismatched GUIDs.
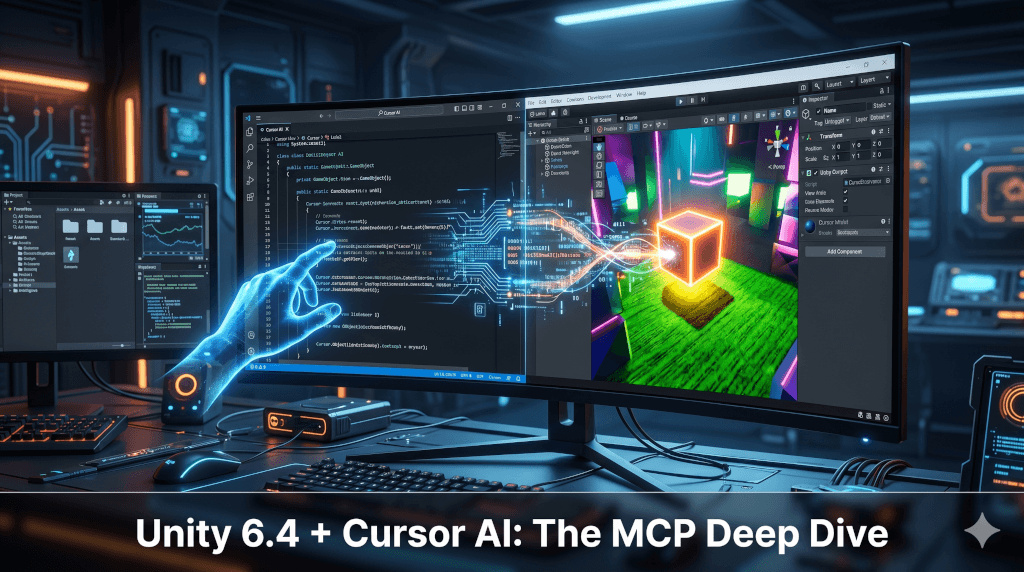
I recently spent a session attempting to build a “standard” prototype—a physics-enabled cube on a ground plane—using Cursor AI as my primary interface. Here is a granular breakdown of the problems we faced, how we solved them, and where you, the human developer, still need to be the expert.
Technical Specs for this Session
- Engine: Unity 6.4 (Universal Render Pipeline)
- IDE: Cursor (Composer Mode enabled)
- Package:
com.unity.ai.assistant(Unity MCP Bridge)
Act 1: The Security Gate (MCP Approval)
The Goal: Create a ground plane, a player cube at (0, 1, 0), a Rigidbody, and a directional light.
The Problem: My first prompt resulted in a hard stop. Cursor attempted to call Unity_RunCommand, but the MCP server returned: Connection revoked. Go to Unity Editor → Project Settings → AI → Unity MCP to change approval.
The Solution: You cannot skip the security handshake. I had to manually navigate to Unity’s Project Settings to authorize the Cursor connection.
The “Human Knowledge” Gap: AI cannot authorize itself. Unity 6.4 treats AI as a “Client” that requires explicit permission. If the AI says it “can’t see the scene,” check your Unity MCP settings first.
Act 2: The Neon Pink Nightmare (URP & GUIDs)
Once the objects existed, the scene was bathed in magenta. In Unity’s Universal Render Pipeline (URP), “Pink” is a cry for help.
Problem A: The GUID Labyrinth
The AI initially tried to “invent” material GUIDs in the scene YAML. When I asked it to create real materials (Ground.mat), Unity’s import process generated actual GUIDs in the .meta files. The scene was still looking for the “hallucinated” IDs.
The Fix: I had the agent grep the .meta files for the real GUIDs, then we updated the SampleScene.unity file directly to link the MeshRenderer to these IDs.
Problem B: The “Invisible” Graphics Settings
Even with correct GUIDs, the materials stayed pink because the Global Graphics Settings were unassigned. In ProjectSettings/GraphicsSettings.asset, the m_CustomRenderPipeline was set to null.
The Fix: We located the project’s PC_RPAsset and assigned its GUID to the global graphics slot.
💡 The “Human Knowledge” Gap: AI is great at editing active scripts (.cs), but it often struggles with ProjectSettings. You must know that URP projects require a Scriptable Render Pipeline Asset assigned globally.
Act 3: Activating the “Self-Healing” Workflow
Instead of fixing these issues manually every time, I directed Cursor to build a “Repair Utility.” This is a crucial step for AI-driven development.
Code Spotlight: The Fixer Script
We created Assets/Editor/FixPrototypeMaterials.cs. This script ensures that even if the AI breaks a reference, a single click restores the scene:
[MenuItem("Tools/Fix Pink Materials (URP Lit)")]
public static void FixMaterials() {
    // Force assign the pipeline if null
    if (GraphicsSettings.defaultRenderPipeline == null) {
        var urpAsset = AssetDatabase.LoadAssetAtPath<UniversalRenderPipelineAsset>(AssetPath);
        GraphicsSettings.defaultRenderPipeline = urpAsset;
    }

    // Re-assign the URP Lit shader to any broken renderers
    var renderers = Object.FindObjectsByType<MeshRenderer>(FindObjectsSortMode.None);
    foreach (var r in renderers) {
        if (r.sharedMaterial.shader.name.Contains("Error")) {
            r.sharedMaterial.shader = Shader.Find("Universal Render Pipeline/Lit");
        }
    }
}
Act 4: Solving “Greybox Blindness”
Once the shaders worked, I hit “Greybox Blindness”—the ground and player were both muted grey/white, making it impossible to see depth under URP’s default Bloom.
The Fix: We pivoted to a High-Contrast Prototyping palette:
- Environment: Grass Green
(0.32, 0.55, 0.28) - Player: Safety Orange
(0.95, 0.25, 0.1)
Watch Suggested Youtube Video
🔑 7 Key Workflows Covered
- Environment Setup
- Code Discovery (
Ctrl + L) - Smart Refactoring
- Agent Mode Automation
- Inline Edits (
Ctrl + K) - “Inspector-Free” Code
- Event-Driven Audio
Summary of Troubles: Human vs. AI
| Challenge | Why AI Stumbled | Human Intervention Required |
|---|---|---|
| Authorization | Restricted by security protocols. | Toggling approval in Project Settings. |
| GUID Sync | Hallucinated IDs instead of reading .meta. | Forcing a read of .meta files to sync with YAML. |
| Global State | Ignored ProjectSettings/ directory. | Identifying the missing URP Asset assignment. |
| Visual Hierarchy | Defaulted to “unreadable” grey. | Dictating a high-contrast color palette. |
Can a New Developer Use This?
The question often arises: Is this workflow actually viable for a beginner?
The short answer is yes, but with a caveat. For a new developer, Cursor and MCP serve as a “Super-Tutor.” Instead of getting stuck on a missing collider for three hours, you can ask the AI to “Check why the physics isn’t working,” and it can inspect the components directly.
However, to build a good prototype, a beginner still needs to learn the “Why” behind the “What.” You can use the AI to generate a movement script, but if you don’t understand the difference between FixedUpdate and Update, your prototype will feel “janky.” The best use case for a new developer is Rapid Iteration: Use the AI to skip the boilerplate, but use the time you save to study the code it generates.
Key Terms Reference
- Unity 6.4: Major engine version with enhanced AI integration.
- MCP (Model Context Protocol): An open standard for connecting AI tools to applications.
- GUID (Globally Unique Identifier): Unique IDs Unity uses to track every asset.
- URP (Universal Render Pipeline): Unity’s modern, scriptable graphics pipeline.
- YAML: The human-readable format Unity uses for scenes and settings.
- Rigidbody: Physics component providing mass and gravity.
- MeshRenderer: Component that draws the 3D geometry.
Conclusion: Is it worth it?
Building a scene via prompt isn’t “hands-off” yet—it’s a collaboration. The AI is your Action Layer (creating files, writing boilerplate), but you are the Architectural Layer.
Final Closing Thought: The Paradox of Time
This first integration between Unity and MCP consumed significantly more time than the task was “supposed” to take. A developer could have manually created these objects ten times over in the time we spent debugging permissions and pipeline settings.
However, manual work is a linear time-sink. This initial friction was the cost of building a pipeline. While Act 1 was slow, every system that follows will now leverage the authorized bridge and the “self-healing” tools we built here. The investment was high, but the potential for future acceleration is massive.
Project: Unity MCP With Cursor TryP | Tools: Cursor, Unity 6.4, Custom Editor Scripts
Most Recent Useful Posts
Practical Ways to Use AI in Indie Game Development
The game industry is undergoing a massive shift, and solo developers are in the best position to capitalize on it. Traditionally, managing code, art, audio, and level design single-handedly has been an inevitable bottleneck. Today, developers have access to enterprise-level productivity through AI. By strategically deploying AI across key phases…
Master AI with This Simple Step-by-Step Roadmap
AI is no longer just a buzzword; it’s the electricity of the 21st century. Like many of you, I spent months watching incredible demos of ChatGPT and Midjourney, wondering how it all actually works. Recently, I decided to stop being just a spectator and start being a creator. But here’s…
The Manager of Ghosts: How Agentic AI Rescued My Projects from the “Middle-Ground” Graveyard
I have a hard drive sitting in the bottom drawer of my desk that I call “The Cemetery.” It’s a dusty, 4TB external brick that contains the digital corpses of my last decade as an indie developer. If you were to plug it in, you’d find folders with optimistic names…
Leave a Reply